How to Go to Black Screen Without Sleep
FIX: Black screen after sleep in Windows 10
Madalina has been a Windows fan ever since she got her hands on her first Windows XP computer. She is interested in all things technology, especially emerging technologies -- AI and DNA computing in... Read more
- If your computer features Windows 10 black screen after sleep, the issue can be fixed from the Hibernation settings.
- When the pc monitor won't turn on after sleep, changing some power options is helpful.
- Checking the network settings is another solution when the screen stays black after sleep.
- If the monitor won't turn on after sleep, try updating the graphics card driver.

With the latest offering of Windows, Microsoft tried to fix up many of the older problems that have plagued Windows since the XP era, but Windows is a massive operating system and not even Microsoft can fix all of its problems in one iteration.
One of such problems involves your computer not waking up after you put it to sleep, there are many reasons for why this could be happening and it is impossible to cover each and every one of them, but we can try our best.
Here are some solutions that might or might not work.
How can I solve black screen sleep mode in Windows 10?
- Turn off Hibernation
- Try a dedicated troubleshooter
- Make some changes in Power Options
- Check the network settings
- Update the graphics card driver
- Use a keyboard shortcut to restart the graphics driver
- Uninstall problematic apps
- Update BIOS
- Disable onboard graphics
- Disable Sleep mode
1. Turn of Hibernation
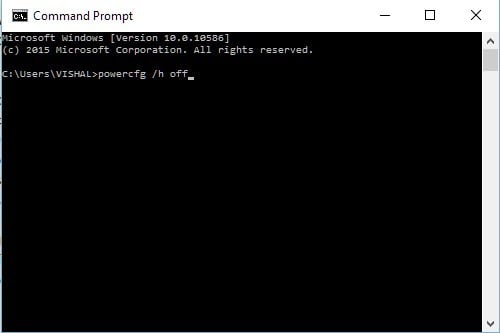
- Type cmd In the Search box and click on Run as an administrator to start Command Prompt.
- Type the following command and press Enter:
powercfg /h offThis will turn off the Hibernation feature on your PC (if you are on a laptop, this means when the battery runs out you might lose your opened work). - After running the command (it will give you no output if it worked) simply restart your PC.
This solution has worked for some people, disabling Hibernation isn't fixing the root of the problem but it somehow fixes the problem anyway.
For many, Hibernation is a feature they don't ever use, so this could be useful.
If your Hibernation files are corrupted, you can fix them with the help of this complete guide.
Also, if Start Menu disappears in Windows 10, get it back with a few simple steps.
2. Try a dediated troubleshooter
This solution can actually be the most convenient one since you only have to run these tools and let them debug your device.
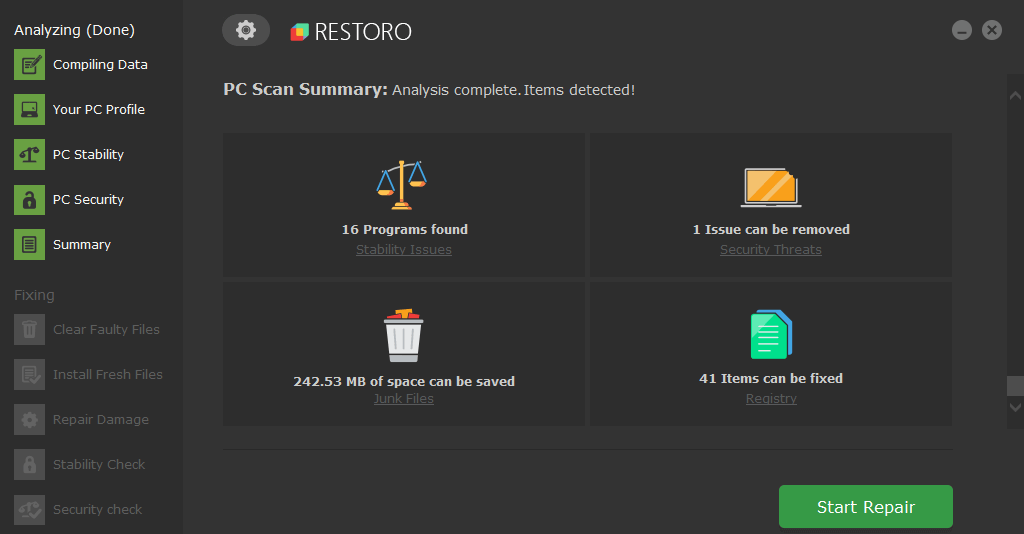
Restoro is powered by an online database that features the latest functional system files for Windows 10 PCs, allowing you to easily replace any elements that can cause a BSoD error.
This software can also help you by creating a restore point before starting the repairs, enabling you to easily restore the previous version of your system if something goes wrong.
This is how you can fix registry errors using Restoro:
- Download and install Restoro.
- Launch the application.
- Wait for the software to identify stability issues and possible corrupted files.
- Press Start Repair.
- Restart your PC for all the changes to take effect.
As soon as the fixing process is completed, your PC should work without problems, and you will not have to worry about BSoD errors or slow response times ever again.
⇒ Get Restoro
Disclaimer: This program needs to be upgraded from the free version in order to perform some specific actions.
3. Make some changes in Power Options

- Click on your Start Menu and type Power Options, then open the first result.
- Click on Choose what the power button does on the left pane.
- Click Change settings that are currently unavailable on the top of this page.
- Scroll down until you find Turn on Fast Startup and uncheck it.
- Save the changes and close it, then restart your PC twice (doing it twice is the important bit).
If the first solution was of no help, this might have been causing the issue – or it might not, but all we can do is a fire in the dark and hope to hit the target since the symptoms are all the same but the cause could be a lot of different things.
If you can't find your Power Plans, get them back by following the easy steps in this article.
4. Check the network settings
- Click on your Start Menu and type Network and Sharing, and open the Network and Sharing Center.

- Click on Change adapter settings in the left pane.

- Right-click on your active Internet adapter and click Properties, if there is only one adapter then that's the one.

- Click the Configure button on the top right and go to the Advanced tab.
- Find Wake on Magic Packet and set it to Disabled, do the same with Wake on Pattern Match.
- Click OK and save the settings, then restart your PC twice (again, twice is the important bit).
This solution has also worked for a lot of people, but there is no way to know whether it will work for you until you try it for yourself.
These things are not simple or easy to diagnose and there are many different variables that could be causing this issue – just because of how complex Windows is as an operating system.
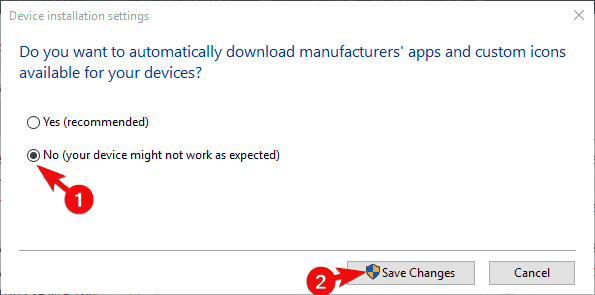
5. Update the graphics card driver
- In the Search bar, type view advanced and open View advanced systems settings.

- Select the Hardware tab and open Device installation settings.
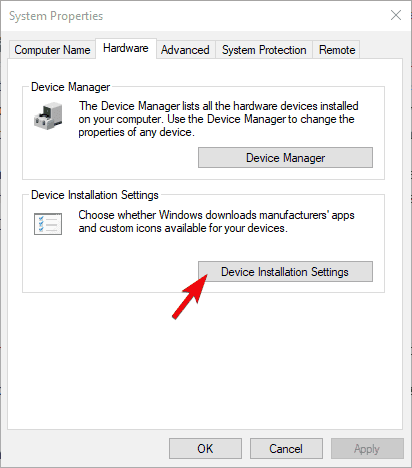
- Disable automatic settings and confirm changes.
We can see what good intentions Microsoft had when they decided to fully-automatize the driver distribution on Windows 10.
With the latest Windows 10 iteration, you don't have to be a knowledgeable user in order to get driver updates.
However, this concept doesn't always work as intended. Especially with sensitive hardware like GPU which occasionally relies on legacy drivers.
And, when the problem with your display occurs, we can assume with relative certainty that the GPU has something to do with that.
Now, we recommend updating your drivers as the first step. On the other hand, if the issue persists, the best way to get the proper drivers is to find them automatically.
You can do that using a tool such as DriverFix. With just one click, it will scan your computer and inform you of which driver needs updating and which news version to use.
Also, what you'll want to do is to dodge future updates via Windows Update.
If you need more info on how to block driver updates on Windows 10, we've written an extensive guide on this subject. Make sure to have a look at it.
6. Use a keyboard shortcut to restart the graphics driver
Now, this isn't a solution but might act as a proper workaround until you resolve the issue completely. Maybe with one of the provided solutions or some of the future Windows updates address this.
Either way, there's a black screen and you can't do a thing besides physically powering off your PC and starting it again.
However, there's a once keyword combination that will, when utilized, restart the graphics driver and the screen might just turn on.
This helped some HP users who were plagued by the same issue. The combination you should try out isWindows key + Ctrl + Shift + B.
It'll automatically restart the graphics driver and the screen should turn on from the Sleep mode.
7. Uninstall problematic apps
- Type Control in Windows Search and open Control Panel.
- Click on Uninstall a program.

- Uninstall any power-related pre-installed application.
- Restart your PC and look for changes.
As the Sleep mode reduces resource usage, it still keeps the applications open so you can resume working. However, some of those apps, especially the ones which come pre-installed, can cause a lot of problems.
Namely, some third-party applications provided by the OEM as supporting software can affect the system performance negatively in various ways. Especially the ones with the power management premises.
Now, one would assume that this software is tested by the OEM and it should improve the PC's performance. And that's true. However, Windows 10 is the one having issues with third-party software.
So, instead of ditching Windows 10 completely, we recommend uninstalling the problematic applications.
If you can't open Control Panel on Windows 10, take a look at this step-by-step guide to find a solution.
8. Update BIOS
Another possible reason for the Sleep mode issues lies in the outdated BIOS firmware. A lot of older machines have a hard time running Windows 10 in a seamless manner without the updated BIOS (UEFI) firmware.
However, even though updating (flashing) procedure isn't complicated as it seems, it's well-recommended to approach it carefully. In case the power outage breaks in the middle of the process, your motherboard might get bricked.
Now, we can advise you to look up your motherboard and update it if needed. If you're not accustomed to this procedure, make sure to check out the guide below where we explained the general flashing process.
If updating BIOS seems scary, make things way easier with the help of this handy guide.
9. Disable onboard graphics
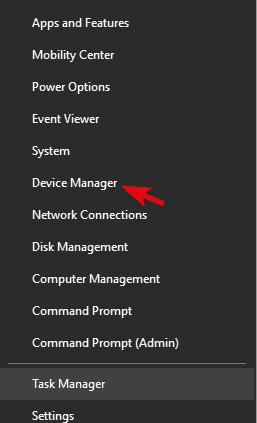
- Right-click Start and open Device manager.
- Navigate to Display adapters and expand the section.
- Right-click on the onboard GPU (mostly Intel) and disable it.
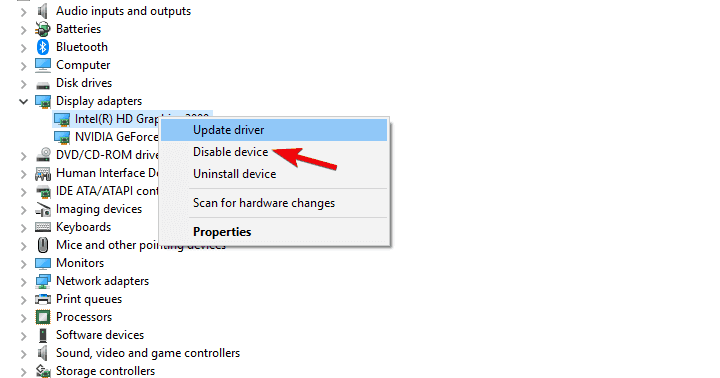
- Restart your PC and check whether the Sleep mode behaves.
Many contemporary laptops come with dual-GPU configurations. The onboard graphics adapter is used for idle work while the dedicated graphics run only when it's needed.
This is great when you want to reduce the power consumption while keeping the PC's performance. However, these integrated GPU cards occasionally have issues with Sleep mode.
With that in mind, we recommend disabling temporarily the onboard graphics adapter and using the dedicated graphics exclusively. There are a few ways to do this.
You can use a GPU suite, Control Center or Catalyst, to disable the integrated graphics card. On the other hand, you can disable the device completely through the system settings.
10. Disable Sleep mode
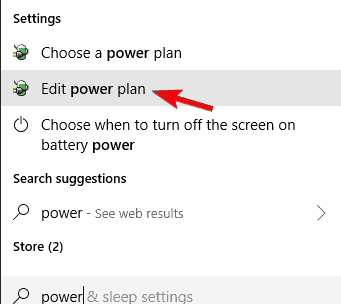
- In the Windows Search bar, type Power and open Edit power plan.
- Set the Put the computer to sleep setting to Never for both On battery and Plugged in options.
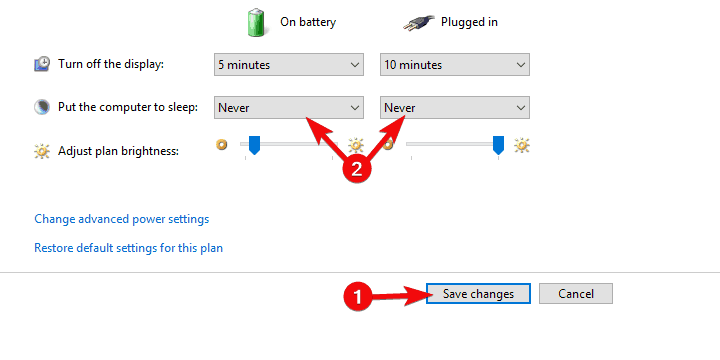
- Confirm changes.
Finally, if you gradually covered all of the aforementioned steps but the problem is still persistent, we advise you to disable the Sleep mode.
Now, this probably isn't something you wanted to hear, but if your PC is performing well in every manner with this one exception, at least consider disabling Sleep mode.
One more cause for this issue could just be random data corruption on the hard disk preventing it from going to sleep properly.
To check if this is the issue you could put your computer to sleep and check if the hard disk indicator light on your computer turns off or not.
If it does not, this might be what is causing your issue.
Fixing this, however, is very complicated and might lead you to the loss of some of your data, so it is better to simply try and install Windows at that point instead of going through hours of backups and restoration procedures.
If you have any other questions or suggestions, don't hesitate to leave them in the comments section below.
![]()
Newsletter
How to Go to Black Screen Without Sleep
Source: https://windowsreport.com/windows-10-black-screen-sleep-fix/
0 Response to "How to Go to Black Screen Without Sleep"
Post a Comment